The One Step Most DIY Floor Projects Skip - and Why It Quietly Costs You
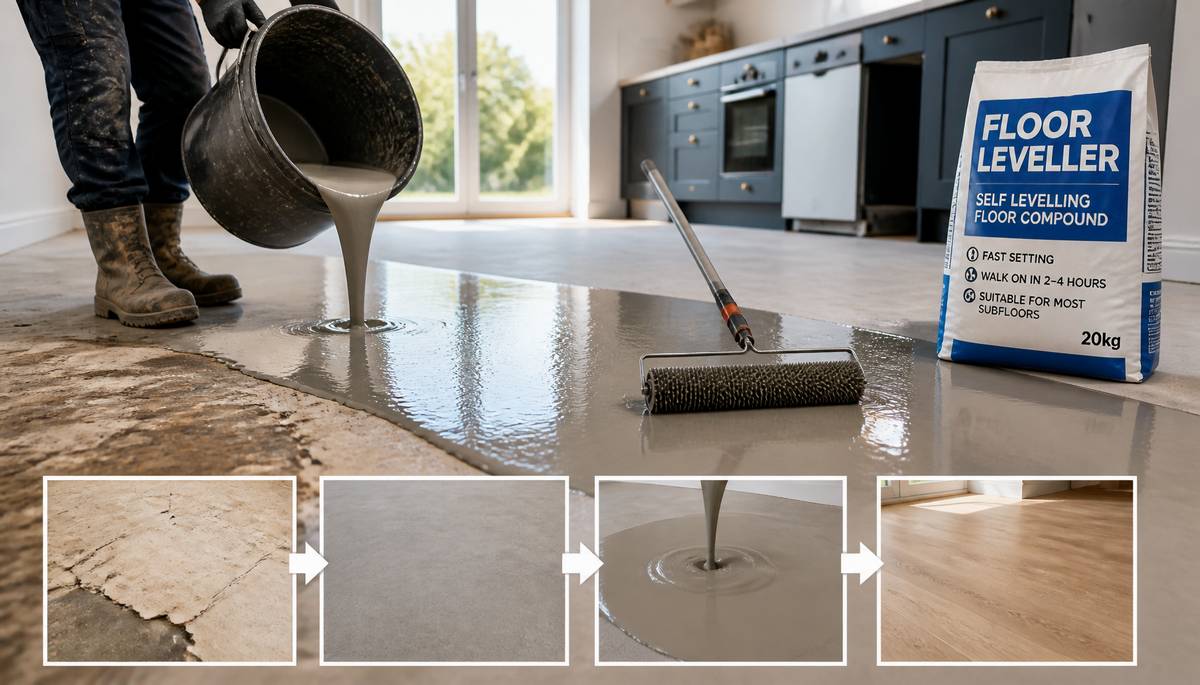 There is a particular kind of regret that settles in about three weeks after a new floor has been laid. The herringbone parquet that looked spectacular on day one has started to creak in three places. The vinyl click flooring has developed a soft spot near the kitchen door that gives slightly underfoot. The kitchen units are sitting just out of true, and the dishwasher refuses to slide all the way in without lifting.
None of these problems are usually caused by the flooring itself. They are caused by what was, or more accurately what was not, done to the floor underneath it.
The Subfloor Problem Nobody Discusses
Almost every flooring tutorial on the internet begins with the same step: clear the room, pull up the old covering, sweep the floor. The next instruction is usually about acclimating the new boards or unpacking the underlay. The bit in between, the bit that decides whether the finished job lasts five years or twenty-five, gets a half-sentence at most.
The subfloor needs to be flat. Not approximately flat, not “near enough”, not “it’ll be hidden anyway”. Flat to within a few millimetres across the length of a room. Most subfloors in the UK, particularly in homes built before the 1990s, are nothing of the sort. Concrete shrinks and dips as it cures. Floorboards settle, creak, and dish slightly between joists. Old screeds crack at the perimeter and lift at the seams.
When a new floor is laid over an uneven base, the consequences appear quickly. Click flooring flexes where the substrate dips, and the joints eventually fail. Tiles crack where the load is uneven. Laminate squeaks where the boards bridge a low spot. None of these are fixable without lifting the floor again.
What a Levelling Compound Actually Does
This is where a Floor Leveller does the unglamorous work that turns a passable floor into a good one. A levelling compound is a cement-based or polymer-modified liquid that is mixed on site, poured across the substrate, and finds its own level by gravity. Within a couple of hours it has set firm. Within a day, in most cases, it can be walked on. Within forty-eight hours, the finished floor can be laid on top of it.
The end result is a substrate that is uniformly flat, free from dips and high spots, and chemically stable. The finished flooring sits evenly across the room. The joints lock as they were designed to. The squeaks do not develop. The dishwasher slides in.
Done correctly, the layer is rarely more than a few millimetres thick. Done badly, it can be thicker, lumpy, and end up being lifted along with the failed floor a year later. The product is not particularly forgiving of poor preparation, which is the second thing the internet tutorials tend to skim past.
What Preparation Actually Looks Like
The substrate has to be clean, sound, and primed. Loose paint, old adhesive, and dust have to come off, because the levelling compound will only bond as well as the surface beneath it. A primer is then rolled across the prepared floor, sealing any porosity in the concrete or the timber, and giving the compound a controlled surface to grip.
After that, mix to the manufacturer’s ratio and pour. A spiked roller through the wet compound releases any trapped air. Then leave it alone. Most failures happen because somebody walked across the wet surface or laid the next layer on too early.
Where Professionals Earn Their Keep
For a small bathroom, a competent DIYer can manage a levelling pour over the course of a Saturday. For an open-plan kitchen, a stairwell landing, or a room with significant dips, the calculation tilts towards a specialist. The cost of getting it wrong, in materials and in re-laying the floor, comfortably outweighs the cost of the right person with the right kit.
It is not a glamorous step. It is invisible the moment the finished floor goes down. But it is the single intervention that decides whether a flooring project looks the same in fifteen years as it did on the first morning, or whether the regret settles in three weeks later, when the first creak appears in front of the fridge.
|
|

